Monday, 17 December 2012

Hitchcock

 Hitchcock
This man is said to be one of the best directors out there, he has directed many horror movies. All of which look good.


'This is one of Hitchcock's famous movies, it's a love story between influential filmmaker Alfred Hitchcock and wife Alma Reville during the filming of Psycho in 1959. 
 
 
This is very well layout design. Text is
displayed on top, middle and bottom, the
lower two are slanted anti clockwise, these
are in line with the cast. I find that the guy
is just blatingly holding a knife in front of
what I assume is his wife, who isn't fazed,
she seems if anything proud and looking at
the camera saying, 'you had it coming'. 


Printing

 Cut Out Man Prints


 Alien Hybrids


Textures


This is all my work from Pritning with Mark. The 'Cut Out Man Prints' were difficult but enjoyable to make. First you draw a man shape and then cut it out, you can then use either the cut out man or the piece of paper thats been cut out from, as a stencil. Now I learnt the hard way on this one, if you want a nice clean sharp edge, you must stick the stencil down with masking tape, then you can use whatever you like, paint, ink, pastels etc.

The 'Alein Hybrids' were even more fun. First, we had to fold the paper vertically in half, then do as many or few creases as we wanted to. Secondly you draw the alien hybrid you wish, and then cut it out. Thirdly you roll paint or ink over it, and then lay it down on top of a fresh clean piece of paper. Lastly you press down against it with a sppon, and then once your sure you've got every part, you peel it away carefully so not to rip it.

The 'Textures' weren't as exciting as the other two, but it was something other than catch up. Firstly you find a few items that you think may have interresting textures; leaves, paint pot racks, wallpaper, and the table, these are the ones I used. Secondly you lay your sheet of paper over the item and rub the oil pastel over it.This will give you a great texture, especially leaves, they look like veins.


Final Design

This is our team's final design.
We feel that the bluryness of the pictures is a clever way to make out the clown ghost is moving at supernatural speed. The red tint of the pictures and black bckground make it look more scary because red can mean danger and death, black can also represent death.

Individual Design


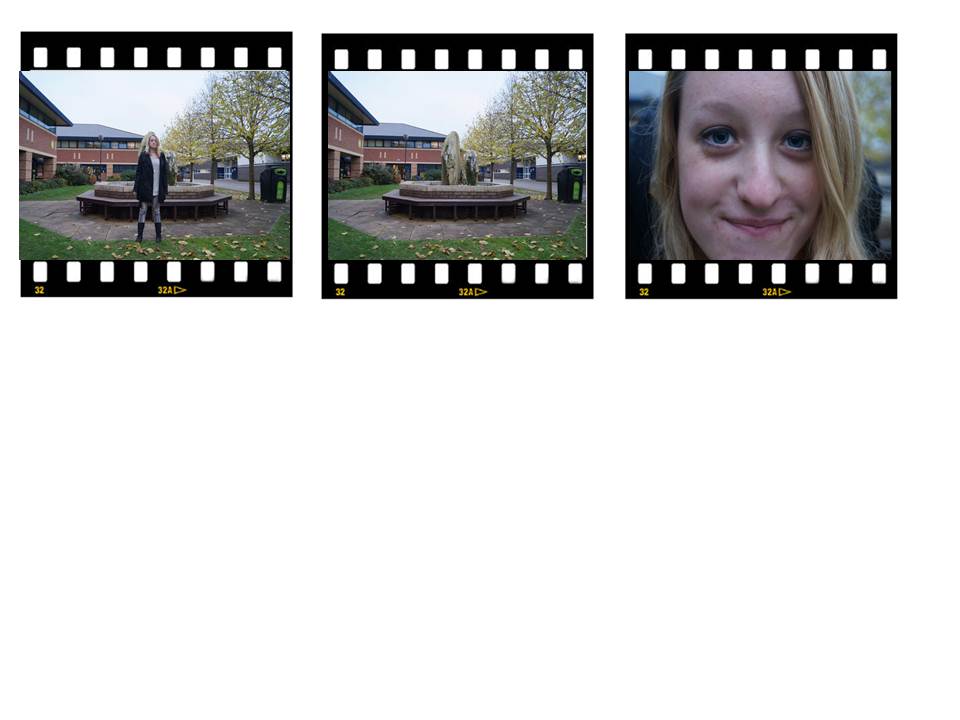
This is my own individual idea. although I did have Sophie as my model.
The story goes that when the clock struck 4, a Tazzie doll peeked out from behind a rock, and walked round, but as soon as she got down from the rock pool, she vanished, only to spring up and keep on creeping forward, until her face fills the whole frame.
This was a practise shoot you see, we were practising stop start motion pictures and I thought that this could be a great individual idea.


Dines Mixed Media

This is my work, inspired by Dines, who uses different cut up materials and then photograph every single little piece, and then puts them into Photoshop and makes them look like hybrids of some kind.
 
These are the steps I took to get the image above. Please remeber these steps are ones I took using Photoshop.


Research

This piece is great, although it's a little too black and dull for my taste, but it's still a good piece. This particular piece of work has had a structure made for it, so that Dines could makes sure everything stayed in the shape he created. Now I don't see it but I've been told that this piece looks like a horse, I can see a little head of a horse in the left top corner. Other than that I can't see this mysterious horse.


Typography

 
This is my typography work, my very own monster font.
 
 
You only have to follow these steps, to produce this, although it's up to you to design your own font using liquify.
Please do also note that this is using Photoshop.


Tinting


This is my best friend, she was my model, I actually took this picture a little bit before project 2 started, but it's the only image I have of a person with this scary expression. The tinting is very easy really and a lot of fun to see at the end. This is how you tint your images using Photoshop

 
The middle left image is the final product, and the process to that is easily done by following the instruction above, from the top the bottom.